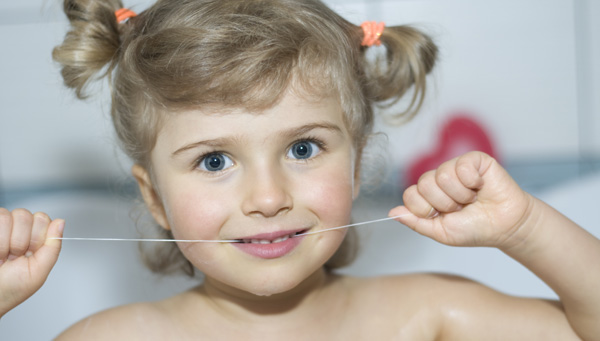
Buying Your Child’s First Toothbrush

One of the most important tools in your child’s mouth-health arsenal is their toothbrush. Often overlooked and under considered, it is vital that you take the time to buy the right toothbrush for your child. Below are some smart shopping guidelines to consider when buying your child’s next toothbrush.   

Bristles

Bristles come in all shapes and sizes, but did you know that most dentists think that soft, rounded bristles make the best toothbrushes? This is because soft bristles effectively clean teeth without damaging sensitive gums. Hard rubber bristle liners (called burs) can cut your gums and do not provide any extra cleaning power. Additionally, the rounded shape is easy on sensitive teeth and gums while sharper shaped tooth brushes can easily fray as well as harm sensitive gums. So when you’re looking for a new toothbrush, look for soft, rounded bristles.  

Size

The toothbrush head should be sized to comfortably fit in your child’s mouth and small enough to clean all of the spots that are tough to reach. The toothbrush head should fit comfortably between their back molars and their cheek. When purchasing their toothbrush, take your child with you so that you can accurately size their new toothbrush. Try to choose a toothbrush that is specifically designed for kids, or your child’s age bracket. 

Handle

There are straight handles, curved handles, angled handles and even handles that vibrate, but the most effective handle isn’t based upon shape, but comfort. When choosing your child’s new toothbrush, you need to make sure that the handle is large enough and comfortable enough for them to hold and brush for two minutes. If the handle is the wrong size, it may not be easy enough for them to grasp and effectively brush their teeth. Look for toothbrushes with a rubber grip so that it is easier for your child to grasp. 

When to Exchange It
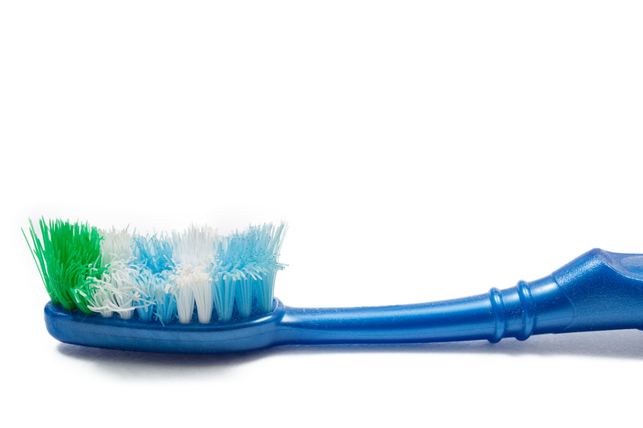
 

Toothbrushes face a couple of different problems that can cut their lifespan short. First, general use wears down bristles and impedes their effectiveness over time. Worn down bristles begin to lose their shape and become obviously frayed. You should exchange your child’s toothbrush when the head begins to lose its shape and the bristles become frayed, usually around three months of use.  

When your child gets sick, it’s time to get a new toothbrush. Bacteria can buildup on the handle and bristles of their toothbrush and can extend their sickness or reignite it at a later date. If your child has a cold or the flu, immediately buy a new toothbrush once they are no longer sick. 

A good rule of thumb is to buy a new toothbrush every three months.  

Ask Us!

All of the above criteria applies to adult toothbrushes in addition to those used by children. If you are unsure of the exact toothbrush your child should use, then consult our office! We will be able to help you choose the best toothbrush for your child, and we can suggest a specific model most of the time. Visit our office today to discuss the tools your children use to attain better oral health! 

Toothbrush Care 101

shutterstock_308646626 (1)To get a healthy smile that lasts a lifetime, it’s important that you begin with the right tools. The most important tool for overall oral health is the toothbrush. The American Academy of Pediatric Dentistry (AAPD) recommends that everyone brush their teeth twice per day, for two minutes at a time. But, brushing your teeth is only as effective as your toothbrush. Below, we discuss how to care for your toothbrush, and list the warning signs of an ineffective toothbrush.

How to Keep Your Toothbrush Clean

To get the most out of your toothbrush, it’s important that you take proper care of it. Here are a few simple ways to ensure that your toothbrush has a healthy lifespan.

1 – Rinse after use. After you brush your teeth, thoroughly rinse the bristle to clean them of toothpaste and debris. Sometimes, debris can remain in a toothbrush after use, and damage the bristles.

2 – Never share. If you share your toothbrush, you risk contracting unhealthy germs from the other person, which can ruin your toothbrush by contamination. To avoid getting sick and sharing disease, stick to your own toothbrush.

3 – Air dry. After you’re done brushing, be sure to let your toothbrush air dry, rather than placing the head in a dark, contained holder. If you put a wet toothbrush in a container, bacteria can grow on the toothbrush head and cause you to become sick. The best way to prevent bacterial growth is by letting your toothbrush air dry in an upright position in a vanity or closet, away from toilet spray.

When to Replace Your Toothbrush

There are a few signs that will indicate it’s time for a new toothbrush. Generally speaking, if any of the following signs presents itself, it’s time to get a new toothbrush.

1 – Losing bristles. If bristles begin falling out, then it’s time to get a new toothbrush. Loose bristles indicate sufficient use and toothbrush age. Additionally, you don’t want to risk swallowing small pieces of synthetic polymers.

2 – Frayed bristles. When the bristles on your toothbrush no longer hold their shape, and they begin tom plume outward, then they are no longer effective. Once your toothbrush head begins to lose shape, then it’s time to get a new toothbrush.

3 – 3 months and older. If your toothbrush is older than 3 months, then it’s likely that one of the two indicators above has occurred. Frayed or not, we typically advise that our patients trade out their old toothbrush for a new one every 3 – 4 months.

4 – Recent illness. If you have recently been sick, then it’s time to trade out your toothbrush. Bacteria and germs from an illness can be passed from your mouth to your toothbrush and survive for weeks

Take Care of Your Tools

Toothbrushes are an important tool in the fight against cavities, so take care of yours! Remember to brush your teeth twice per day for two minutes at a time. After you’re done brushing, thoroughly clean your toothbrush, and look for signs of it aging.

Four Common Dental Myths and The Facts Behind Them

shutterstock_341923241 (1) Ah the internet. It can be a fantastic resource to access an infinite amount of knowledge and data, or it can be used to spread baseless rumors that confuse otherwise intelligent people. Unfortunately, the internet has made it much easier for people to share healthcare myths that can mislead people into making unhealthy decisions. Below are a few dental myths, and the facts behind them.
Myth 1 – Sugar Causes Tooth Decay

This one is somewhat true, but sugar doesn’t actually cause tooth decay, rather, it plays an important role in the process. Cavities are actually caused by acid bad oral bacteria. Acid breaks down tooth enamel, which leaves teeth more susceptible to cavities. While sugar provides bad bacteria with the energy it needs to cause tooth decay.

Myth 2 – Placing Aspirin on a Toothache will Alleviate the Pain

This is an interesting one that is actually an old wives tale. However, we should dispel this outright: pain relievers do not work like that. Instead, it works by entering the blood stream through the intestines and blocking the production of certain chemicals in the body that cause pain. Aspirin and other pain relievers can only work once they’ve entered the blood stream, which is why placing an Aspirin next to a sore tooth won’t work.

Myth 3 – Baby Teeth aren’t as Important as Adult Teeth

This is a strange one, but some people view baby teeth as less important than adult teeth because they are impermanent. While they won’t be in your mouth through adulthood, baby teeth play an integral role in the development of a young smile. Baby teeth serve as place holders for incoming adult teeth. If baby teeth are lost too early, incoming permanent teeth could drift into the vacant space and make it difficult for new adult teeth to find space. This can lead to crowded teeth, a crooked smile, and a misaligned bite, all of which can be quite costly to fix, which is why it is very important that you take care of your children’s baby teeth.

Myth 4 – You can’t get a Cavity under a Crown

Here’s one that has been circulating lately, but let’s put it to rest: you absolutely can get a cavity beneath a crown. Dental crowns (or caps) are placed on teeth that have suffered damage above the gumline. Because of this, most of the tooth that is visible is covered. This leads people to believe that, because the tooth is mostly covered, that it is immune to cavities. This is patently false. Tooth decay can – and will – accumulate at the base of the crown if it is not properly cleaned – brushing twice per day for two minutes at a time and flossing once per day.

Visit Our Office

Please visit our office if you have any questions about oral healthcare. We have years of dental training which has equipped us with the knowledge needed to answer any question you may have.

Baby Bottle Do’s and Don’ts to Avoid Childhood Cavities

Babby Bottle Featured
Did you know that childhood cavities are the most common chronic childhood disease, and are almost entirely preventable? A great place to prevent cavities is in your child’s baby bottle. Follow these steps to help keep your infant cavity-free.

Don’t: Put Sugary Drinks in Your Child’s Baby Bottle

Putting sugary beverages such as fruit juice or sports drinks in your infant’s bottle is not recommended. High amounts of sugar can lead to tooth decay and cause more dental problems as their teeth begin to appear. Cavities in baby teeth can also cause complications in new adult teeth.

Do: Wipe out Their Mouth after Meals

With a damp, clean cloth, wipe out your child’s mouth 15 minutes after each meal – liquid or solid. Doing so keeps their mouth free of sugar and debris that can lead to cavities.

Don’t: Send Them to Bed with a Bottle

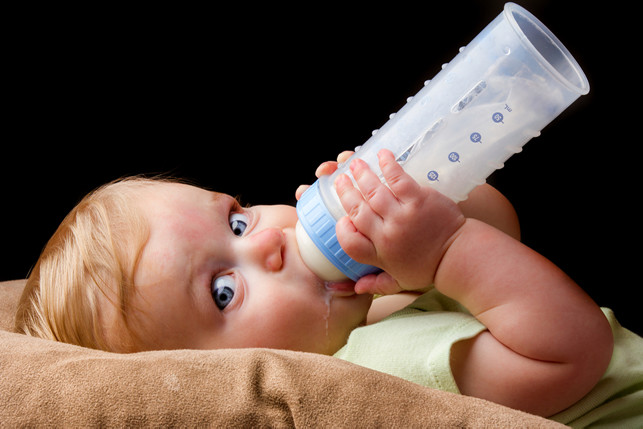
While a bedtime bottle may comfort your infant, it can be very destructive for their gums and developing teeth. When left in your children’s mouth, sugar from breast milk, formula and milk can lead to infection and pain. Try to establish a bedtime routine that doesn’t involve a baby bottle.

Do: Let Them to Have a Drink before Bed

A good way to get your child off of the bedtime bottle is by giving them a long drink before bedtime. Try to get into a routine that allows them to sip from their bottle while they’re in bed, but under your supervision. Take the bottle with you before turning the lights out and letting them sleep. This sort of routine will get them accustomed to having a drink right before bed, and prevent them from craving a bedtime bottle.

Don’t: Heat Their Bottle in the Microwave

Microwaves are convenient and quick, but they shouldn’t be used to heat a bottle full of formula. Not only does a microwave heat formula unevenly, it can get formula too hot to drink. Additionally, the extreme heat from microwaves can damage and wear plastic baby bottles.

Do: Heat Their Bottle in a Pot of Warm Water

The best way to warm bottled formula is in a pot full of water upon the stove. To do this, fill a pot that is tall enough to completely cover their bottle. Warm the pot on a low-medium setting for 4 – 5 minutes. Then, place the bottle in the water and let it heat up for 1 – 2 minutes. Before serving your infant, check the temperature of the formula by putting a dab on the inside of your forearm to make sure that it isn’t too hot.

Don’t: Let Them Walk around with Their Baby Bottle

As your child begins walking, they’ll also begin falling, which is why you shouldn’t let newly mobile children walk with their bottle. Did you know that every 4 hours a child in America visits the hospital because a facial injury as a result of falling while holding a bottle? You can avoid this by not giving them a walking around bottle, and having them sit down before they drink.

Do: Teach them to Drink from Lidless Cups

You should begin weaning your child off of their bottle around the time that they begin walking – typically ages 12 – 18 months. A good way to do this is by transitioning to a sipping cup, or by letting them drink from lidless cups at meal time. There will be some spilling at first, so try to only give your child water, or a sugarless beverage that’s easy to clean. Introducing them to adult cups at an early age will help them rely less upon the bottle, and diminish the likelihood of them sustaining an injury as a result of walking with a baby bottle.

Check up on Cavities Every Six Months

The best way to prevent childhood tooth decay is by establishing a dental home for your child before their first birthday. Familiarizing them with a pediatric dentist early on will help your child get more comfortable visiting the dentist and keeping their mouths clean. After finding a dental home, visit the pediatric dentist every six months to make sure that their mouths are staying clean!

6 Ways to Keep Your Kids’ Tooth Enamel Strong

strong enamel photo
Tooth enamel is the first line of defense your teeth have against plaque and cavities. It is the white, visible part of the tooth and it is also the hardest part of the human body. Unfortunately, tooth enamel takes a lot of abuse from the acids formed by cavity-causing bacteria. So how can you protect your child’s tooth enamel?

1. Avoid Sugary Foods and Drinks

Sugar feeds the bacteria on your teeth, causing plaque and ultimately cavities, which is why you should limit the number of sugary foods and drinks your child consumes. Before buying your children snacks, check the back of the package for the amount of sugar contained in the snack. Try to avoid sugary drinks like soda, fruit juice and sports drinks, all of which are notoriously high in sugar.

2. Add Calcium Rich Foods

Calcium is a dental super mineral. That’s because it neutralizes damaging acids and is a great enamel protector. Try to add at least one dairy product to each of your child’s meals to provide them with adequate amount of calcium. If your child does not consume dairy, try giving her some of these other calcium-rich foods: almond milk, canned fish, kale, soy yogurt or soy beans. If you’re buying packaged food as a calcium source, check the packaging to ensure that there is an adequate amount for your child.

3. Brush and Floss Regularly

Food debris left on your child’s teeth encourages bacteria growth that eats away at enamel and causes cavities. This is why it is important to brush twice per day, for two minutes at a time, and floss once per day to clean debris from the hard-to-reach areas of your child’s teeth. If your child is unable to floss by themselves, then floss their teeth for them. Brushing and flossing your child’s teeth are a great way to keep their mouths debris-free and fight plaque buildup.

4. Rinse after Meals

A great way to remove food debris from your child’s mouth is by having them rinse immediately after meals. Have your child swish clean water in their mouth for 30 seconds, and then spit it out in a sink. Encourage them to do this after each meal to keep their mouth clean and healthy.

5. Limit Citrus

Food and drinks high in citric acid erode tooth enamel in a process called demineralization. In bad cases of demineralization, acid will work its way to the soft layer beneath the enamel called the dentin. These advanced cases lead to tooth sensitivity and pain. If you consume anything with high citric acid, rinse with water for 30 seconds afterwards to clean away some of the lingering acid.

6. Use Fluoridated Toothpaste

Toothpaste with fluoride strengthens enamel through a process called remineralization. When choosing fluoridated toothpaste for your child, make sure that it has the ADA seal of approval to ensure that it has been rigorously tested and approved.

Visit Our Office


Visit our office so that we can evaluate your child’s overall oral health. We check and document the state of your child’s tooth enamel as a part of our regular checkups, and we will help give you and your child the knowledge necessary to keep a healthy, lifelong smile.

Important: Essential Tips to Manage a Dental Emergency

Dental Emergencies
By definition an emergency is generally unexpected, which means you didn’t plan on an accident occurring (of course!)  But you can prepare for common dental emergencies in case they do happen.  Knowing what to do can sometimes be the difference in saving or losing a tooth.  Here are a few essential tips to read over and understand…before you need them.

Establish a dental home.


When a dental emergency occurs, it’s essential to get prompt treatment.  Of course, the first (and best) step is to have an established dental home.  Whether an injury happens on the playground, in school or at home, having a dental home and maintaining regular dental check-ups and cleanings is the first and best way to be prepared.  Not only will you have an existing relationship already established, but you will also have someone to call who can provide guidance, care and support.

Like all emergencies, dental emergencies appear out of nowhere and demand immediate attention. Knowing what to do when an emergency arises is key to having a positive outcome and preventing a bad situation from getting worse. Just as we spend time learning first aid procedures for bodily emergencies, making a special effort to focus on handling dental emergencies means that you are prepared to take care of any situation, no matter what.

According to the American Academy of Pediatric Dentistry (AAPD), here are a few best practices for the following scenarios:

If a baby tooth is knocked out: 

Contact the dentist ASAP.

If a permanent tooth is knocked out:

Find and carefully rinse the tooth in cool water. Do not use soap or scrub the tooth. Simply rinse it in cool water. Replace the tooth in the socket, if possible, and hold it in place with a clean piece of gauze or a washcloth.  If putting the tooth back in the socket isn’t an option, place the tooth in a clean cup with milk, saliva, or water. Contact the dentist immediately.  Prompt treatment is required to potentially save the tooth.

If a tooth is chipped or damaged

Contact the dentist immediately. Find any tooth fragments. Rinse in cool water and place in a clean cup with milk, saliva, or water and take them with you to the dentist. Prompt treatment is critical for preventing infection and avoiding potential complications. If there is any injury to the mouth, treat with cold compresses to decrease swelling.

If tooth loss is the result of a more severe or complicated injury, call for emergency services to insure that proper care is given to the entire injury. Call the dentist en route to the hospital or immediately upon arrival.

Keep up with check-ups.


An emergency situation is no time to try to come up with a plan of action. Instead, it’s best to be prepared well in advance of any unforeseen injuries. Maintaining regular six month check-ups can help lay the groundwork for handling potential emergency situations when you don’t have time to think about what to do next.

Four Tips for Keeping Your Kids Cavity Free

Cavity Free Kids

Did you know that the most common chronic disease of children and teens is tooth decay?  Even worse, the CDC reports that nearly 20% of children’s cavities are left untreated.  What may be even more surprising is that nearly all cavities are 100% preventable.  In fact, simply by following these 6 steps, you could help your child enter adulthood without suffering from even a single cavity.

Take advantage of sealants or composite fillings.

Sealants are the most effective, yet most underutilized method of preventing cavities.  Dental sealants involve a temporary, thin plastic coating that is “painted” on the chewing surfaces of teeth which creates a barrier where food often gets trapped.  Composite fillings are sometimes used as an alternative to sealants, but in the same way by filling deep crevices.  The relatively low cost of sealants makes them an obvious choice when compared with the discomfort and higher costs of treating a cavity.

Limit foods that tend to stick to teeth.

Sticky candies like caramel and taffy often stay around for a long time after kids eat them.  But candy isn’t the only food which needs to be limited.  Crackers, potato chips and other starchy foods also tend to get stuck in the nooks and crannies of tooth surfaces.  Without proper brushing, these foods provide sugar to bacteria that feed on it and multiply and attack enamel.  For this reason, these foods should be limited and occasional.  Regular brushing and flossing is essential when these foods are consumed.

Begin good dental habits early.

Oral care can begin even before teeth appear.  Using a soft cloth to clean your baby’s gums can limit bacteria and protect emerging teeth.  Small children should get help with brushing.

Model good dental habits.

One of the most effective ways you can ensure that your children stay cavity free is by modeling good dental habits in front of them.  Do they see you brush?  Are you flossing daily?  Modeling good behaviors will teach your children first hand that you value your own oral health and theirs.

Four Ways to Fight Foul Breath

fix bad breath
 

Bad breath can affect people of all ages.  Using mouth sprays and mints only cover up symptoms because bad breath is the result of bacteria build up. When air passes over that bacteria, it dries and causes a foul smell. There are four easy ways you and your children can avoid this persistent problem and have a healthier mouth in the process.

1. Brush Regularly.

It may seem obvious that we should all brush our teeth twice every day and floss daily to keep our teeth clean, but many people forget that your gums need cleaning, too.  Just beneath the gum line, bacteria can make camp for a long visit. Brushing your teeth (and gums) for 2 minutes twice a day will keep your breath crisp and keep your mouth healthy. Be sure to use a soft-bristled brush.  Hard bristles can damage gums and create a bigger problem.

2. Use a Tongue Scraper.

Your tongue is a soft, moist incubator for bacteria.  Tongue scrapers work to wake to wake up that bacteria and kick them out of bed. Use a tongue scraper after every meal to ensure there are no left overs still hanging around.  The less leftover food particles on our tongues mean less fuel for bacteria growth.  The advent of disposable tongue scrapers makes this an easy and convenient way to fight bad breath.  Gently scrape from the back of your tongue to the tip and throw away.

3. Avoid Smelly (and Sugary) Foods.

What we put in our mouths can make a huge difference in the outcome of our breath.  Sugars from soda, candy and desserts feed the bacteria that give our breath its distinct smell.  Try avoiding sugary drinks and candies as much as possible and replacing them with sugar-free gum.  This increases the natural saliva flow in our mouths, which is a natural mouth cleanser.

4. Don’t Neglect Regular Cleanings.

That feeling of a completely clean mouth cannot be matched by any home cleaning.  Staying on top of your oral hygiene can make a big difference for mouth odor, but there is only so much you’re able do at home.  Dentists and professional dental hygienists know all the nooks and crannies that bacteria like to hide in.    Going to your regular dental appointments, every six months, will ensure that any spots that you cannot take care of in your daily cleaning regiment are properly tended to.

Thankfully, You Can Love Chocolate AND Your Teeth!

 
chocolate and kids teeth


Like us, we’re sure you LOVE chocolate.  Plus, it’s almost a required gift for holidays like Valentine’s Day. And while candy generally doesn’t mix well with keeping teeth healthy, dark chocolate (the kind with at least 70% cocoa) can actually be a cavity fighter. That’s obviously fantastic news for chocolate lovers.

Of course, it’s always important to brush for at least two minutes, twice a day and to floss daily.  But you don’t need to worry about wrecking your teeth by indulging in chocolate from time to time.  Here are a few reasons why chocolate is a great candy choice.

Chocolate contains polyphenols.

Polyphenols are a class of naturally occurring chemicals that can limit oral bacteria. They are also able to neutralize the microorganisms that cause bad breath and prevent bacteria from turning sugar and starches into acid. Polyphenols have great promise for their apparent anticancer and anti-inflammatory effects as well as their ability to reduce hypertension and stroke.
natuarl-chocolate-for-teeth


Chocolate is high in antioxidants.

Antioxidants are a group of molecules that keep your body healthy on a cellular level and chocolate contains a lot of them. In fact, dark chocolate can contain up to four times the level found in green tea. High amounts of antioxidants in saliva have been shown to fight periodontal disease.

Tannins are abundant in chocolate.

Tannins are plant compounds that are found in many of the foods we eat. They’re also what give dark chocolate its slightly bitter taste and dark color. Tannins have been shown to help stop bacteria from sticking to teeth because their molecules bind to bacteria before plaque has time to form.


chocolate good for teeth

A flavonoid compound called epicatechin is found in high quantities in chocolate.

Flavonoids are a group of plant-based antioxidants that have been shown to slow tooth decay. A recent study by researchers at the University of California showed that a particular flavonoid calledepicatechin displays a remarkable ability to reduce cholesterol, blood clots and clogged arteries.

Again, chocolate should be at least 70% cocoa for most of these benefits to your teeth and body. However, almost any food can be eaten in moderation, as long as you remember to keep brushing regularly.

Subscribe to our blog for more tips on eating healthy and taking care of your smile!

Tips to Make Your Child (and you!) a Pro Flosser

Help kids floss
Flossing removes plaque between the teeth and gum-line where a toothbrush can’t reach. In fact some sources indicate that brushing alone only reaches 35% of your tooth surfaces.  Unfortunately, it’s also one of the most overlooked practices in caring for our teeth.   You should floss your child’s teeth daily until he or she can do it alone, usually at least until children can tie their own shoes.

Getting children in the habit of daily flossing can yield a lifetime of benefits.

Here are five flossing tips to encourage your child (and you!) to start a regular flossing routine:

  1. Children tend to get better results by using flat, wide dental tape because of the larger spaces between their teeth, however you should choose floss based on what works for you and your child.
  2. Flossing should begin when any two teeth touch.
  3. Use around 15-18 inches of floss, wrapped around your index fingers and held tightly but gently.  Children who find it difficult to use this method often benefit from using a flosser designed just for small hands
  4. Be gentle and avoid snapping floss between teeth because it can damage sensitive gum tissue.
  5. Floss both sides of the tooth, even when another tooth is missing on one side.

Want to learn more about how to floss?  Visit the mouthhealthy.org website for great tips on flossing or ask us to show you and your child how to properly floss on your next visit!

Latest News from Children's Dental Specialties